
Pairing a Device
Pairing connects the copy of VolNinja running on your machine to your VolNinja account. Once a device is paired, you can open your trading app from anywhere and it reaches your machine over a private link. Every position, order, and your broker connection stay on your machine, never in the cloud. See How VolNinja works for the full picture of that split.
You only need to pair once per machine.
Before you pair
Pairing becomes available once two things are true:
- Your email is verified and your subscription is active. Both happen during signup and checkout; see Account & billing. If either is missing, the pairing screen tells you which one to finish first.
- VolNinja is installed and running on your machine. If you haven't done that yet, start with Installing & starting VolNinja.
Important
Pairing links your account to one machine at a time. Pairing a new machine replaces the previous one and disconnects the old device. This is intentional: your account always points at a single running install.
The normal way: from the setup panel
VolNinja serves a small setup panel on your own machine. This is where you connect both your broker and your account, and it's the easiest way to pair: no code to type or token to copy.
- On the machine running VolNinja, open the setup panel (a browser tab pointed at your local install). On VolNinja Desktop it opens by itself the first time; you can reopen it from the menu bar / tray icon → Open Setup.
- On the Connect to VolNinja Cloud card, click Connect to VolNinja Cloud. A short code appears.
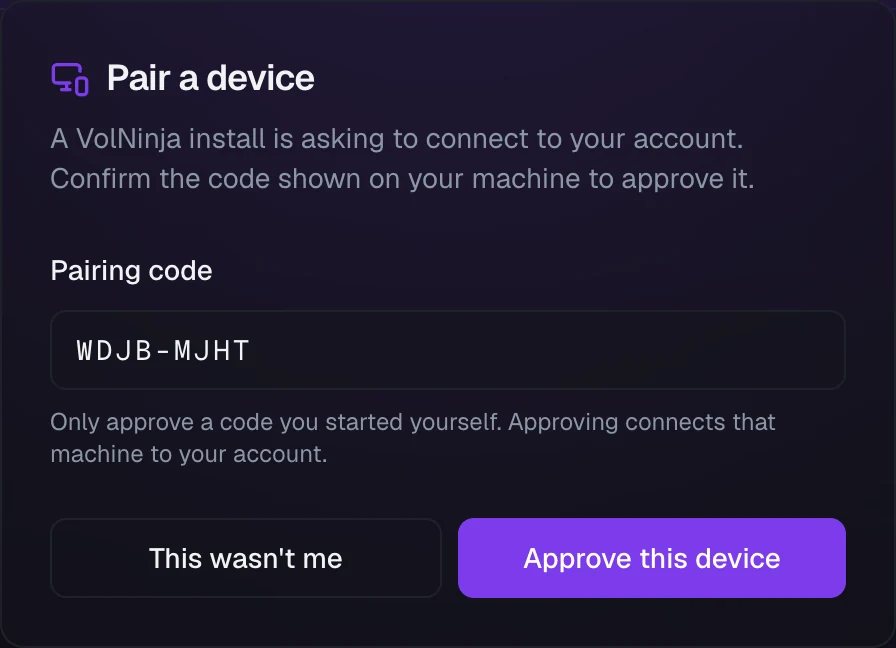
- Click Open approval page. A browser tab opens on the VolNinja site showing a Pair a device card, with the pairing code already filled in. Check it matches the code on your machine.
- Click Approve this device. You'll see Device approved, and your machine detects the connection and comes online automatically.
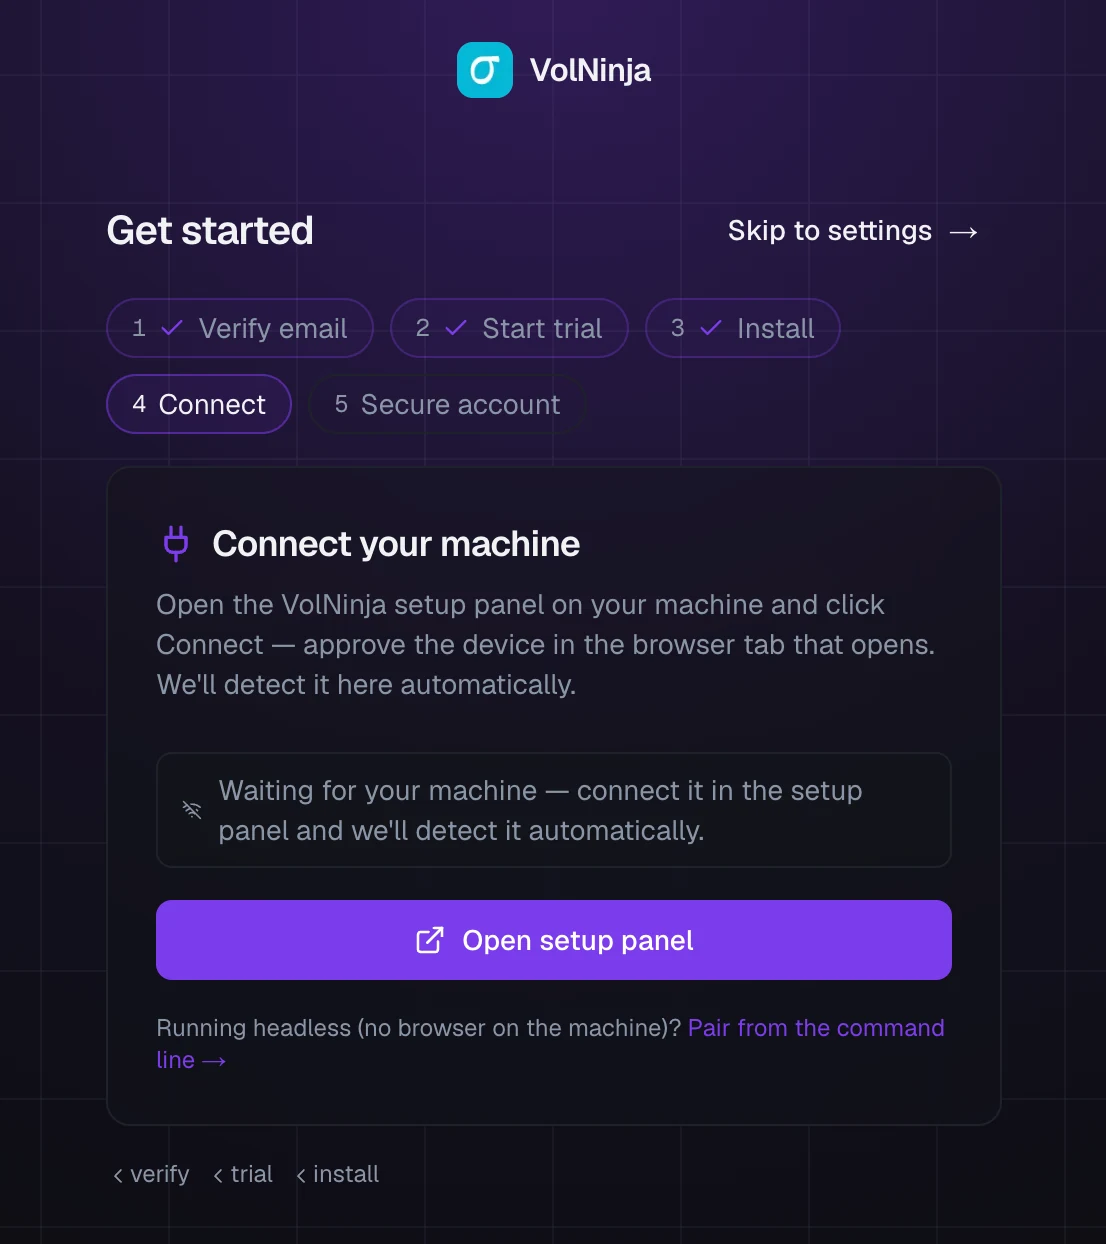
If you're going through the Get started wizard after signing up, this is its Connect step. The card there is titled Connect your machine; press Open setup panel, pair as above, and the step shows your machine as connected as soon as your install links up.
Tip
You don't have to start from the setup panel. If you land on the Pair a device screen directly, type the Pairing code shown on your machine (it looks like XXXX-XXXX) and click Approve this device.
Approving safely
One rule covers the approval screen: only approve a code you started yourself. Approving is what connects a machine to your account, so treat the code like a key.
Important
If a Pair a device screen appears and you didn't start it, click This wasn't me. Nothing is connected and nothing on your account changes. Never approve a code someone else gave you: approving would hand them a link to your running install.
If a code doesn't work, it has usually expired or been already used. Codes are short-lived by design, so generate a fresh one from your machine and try again.
Headless machines and servers
On a server or VPS with no browser, pair from the command line instead. Run volninja pair --headless on the server; it prints an approval link. Open that link here in your browser, sign in if asked, and click Approve this device. Your server receives the connection automatically; there's still nothing to copy. The Docker & VPS install guide has the full steps.
What pairing grants
Approving a device gives your VolNinja account a private link to that one machine, and nothing more. Specifically:
- The trading app (served from the cloud) can reach your install, so you can open it from any browser you're logged in on. See Remote access.
- Your trading data and IBKR connection never leave your machine. The cloud only carries requests back and forth over the private link; it stores none of your positions or orders.
From your account you can see every paired device, including whether it's currently Connected and when it was last seen, and you can revoke any of them to cut the link immediately. That's covered in Managing your account.